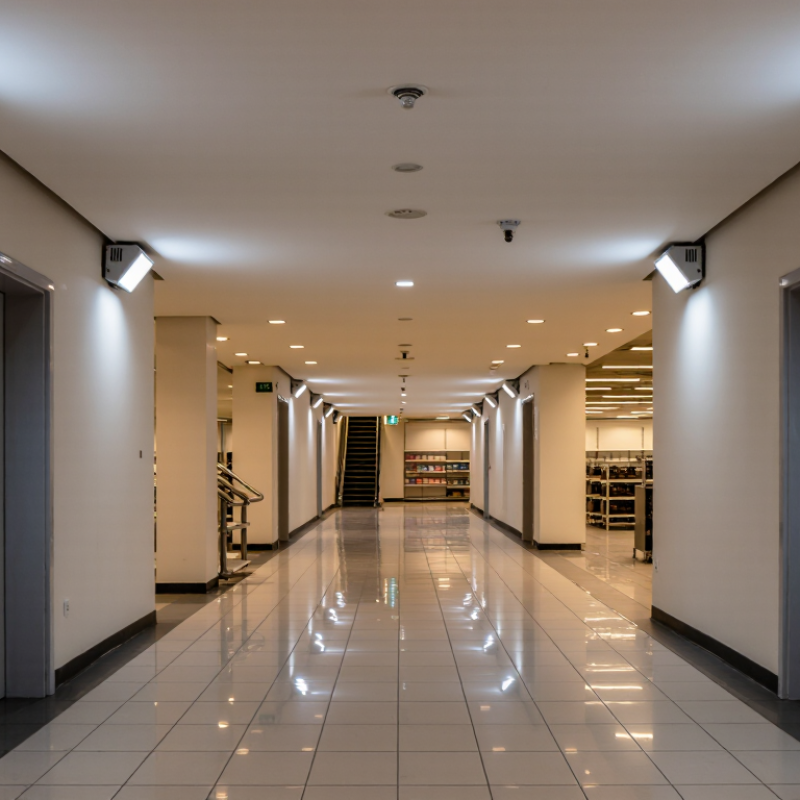
| 1 | Dual-head battery emergency unit | Corridors, small rooms, and areas needing adjustable emergency beams. | Wall- or ceiling-mount the unit; aim each head to cover the required path and avoid blocked or poorly directed beams. | Test the lamps and battery operation according to the manufacturer’s instructions and the applicable inspection schedule. Replace failed batteries or heads with compatible parts. | Check emergency-mode light output, battery type, rated duration, head adjustability, and suitability for the mounting location. |
| 2 | Recessed emergency downlight | Finished ceilings where a low-profile appearance is preferred. | Confirm ceiling cutout, plenum and insulation requirements, access to the driver or battery, and the approved wiring method before installation. | Use the test switch or built-in test function as specified. Keep the test control accessible and check that the emergency mode operates correctly. | Verify ceiling compatibility, emergency output, battery access, and whether the unit is maintained or non-maintained. |
| 3 | Surface-mounted emergency bulkhead | Stairwells, corridors, utility spaces, and other areas with exposed or solid ceilings. | Mount to a suitable surface and connect to the specified supply. Follow the enclosure’s installation instructions and preserve access for inspection. | Check the indicator, test function, lens, and battery condition. Clean the lens with a method approved by the manufacturer. | Confirm mounting orientation, enclosure rating, supply requirements, emergency-mode output, and rated duration. |
| 4 | Weather-resistant emergency bulkhead | Locations exposed to moisture, dust, or outdoor conditions, when the product is specifically listed for that environment. | Use the specified glands, seals, and mounting method. Do not assume an indoor-rated fitting is suitable for a damp, wet, or hazardous location. | Inspect seals, enclosure, lens, and cable entries for damage or water ingress; perform functional tests as instructed. | Check the exact environmental rating, temperature range, corrosion resistance, and any restrictions on installation location. |
| 5 | High-bay emergency luminaire | Warehouses, workshops, and other spaces with high ceilings. | Confirm the emergency light distribution at the mounting height. Coordinate installation with access equipment and the building’s lighting layout. | Test emergency operation and inspect the luminaire and battery or emergency driver. Plan safe access for periodic inspection. | Review emergency-mode photometric data, mounting height, temperature limits, driver compatibility, and maintenance access. |
| 6 | Illuminated LED exit sign with battery backup | Exit identification along designated egress routes and at required exit locations. | Install where the sign is visible along the route, using the permitted mounting orientation and required directional legend. | Check sign illumination, directional inserts, charge indicator, and emergency operation. Test the battery backup as specified. | Verify legend, viewing conditions, mounting options, local sign requirements, and rated emergency duration. |
| 7 | Remote-head emergency lighting system | Sites where several remote heads can be served by a compatible central emergency unit. | Confirm the heads and supply unit are designed to work together. Follow cable-length, circuit, and load limits stated by the manufacturer. | Test the complete system, including the supply unit and each connected head. Inspect wiring and connections during scheduled maintenance. | Check system capacity, compatible head types, circuit layout, cable limits, and how a unit fault is indicated. |
| 8 | Central-inverter-fed emergency LED luminaire | Buildings using a central emergency power or inverter system for designated lighting circuits. | Use luminaires and drivers confirmed as compatible with the inverter. Circuit design and commissioning should be performed by qualified personnel. | Test the central source and the connected emergency lighting circuits. Maintain the inverter and batteries according to the system documentation. | Verify inverter compatibility, circuit arrangement, load capacity, transfer behavior, monitoring, and required emergency duration. |
| 9 | Self-testing LED emergency luminaire | Facilities seeking automatic functional and duration testing with status indication. | Install the test indicator where it can be seen and follow setup instructions for test timing and any building monitoring connection. | Review test results and fault indicators; automatic testing does not remove the need for required records, inspections, or corrective maintenance. | Check what tests are performed, how failures are reported, whether results are retained, and whether the system meets local documentation requirements. |
| 10 | Combination exit sign and emergency light | Locations where both an illuminated exit sign and emergency illumination are needed at the same point. | Position the sign for clear visibility and aim the emergency heads to serve the intended egress area. Confirm both functions are permitted at the location. | Test the sign and emergency heads in backup mode; check the battery indicator, lenses, and directional legend. | Assess sign visibility, emergency light distribution, mounting height, battery duration, and whether separate fittings are required by the design. |